

This solution walks you through the process of adding Quick Parts to the default template of a custom content type. This way, anyone who selects that content type from the library will create a new form with those Quick Parts added already. By filling out the Quick Parts fields, the metadata for that document will also be filled out in the corresponding SharePoint columns.
The step-by-step will assume you already have a library and custom document content type prepared. For more information on associating content types to a library, please see The SharePoint Shepherd’s Guide for End Users tasks “Create a Library App” and “Edit List or Library App Content Types.” For our example, we’ll use a library called Resources with the content type Invoice, which uses site columns Invoice # and PO #.
Task 1: Create a Content Type Template
This task walks you through drafting and editing the default template for your content type. In our example, our content type is for invoice forms, and we already have the form designed. We just need to add the Quick Parts, then save the document as a template. We’ll save it locally, which will allow us to access it when we edit the content type’s default template later.
1. In a web browser, navigate to the SharePoint library that has your content type. For our example, we’ll go to the Resources library. The library’s default view will open.
2. In the command bar, click New to open the drop-down menu.
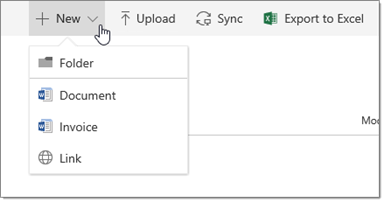
Figure 1: The Expanded New Menu
3. Select the custom content type. For our example, we’ll select Invoice. Depending on your library’s settings, Microsoft Word will launch.
Note: Depending on your settings, Word Online may launch. At the top of the Word Online window in the ribbon, click Edit in Word. The We’re opening this in Microsoft Word… dialog box will appear, and Microsoft Word will launch.
4. If it isn’t already designed, design your form or copy and paste in the contents of an existing form. For our example, we already have our invoice form prepared, so we’ll copy and paste it in.
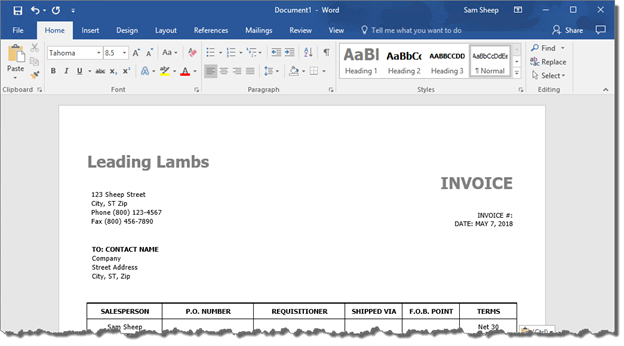
Figure 2: The Invoice Form in the New Document
5. Click the Insert tab to open the Insert ribbon.
6. Find a location on the document that will contain the information you want to send to SharePoint. For our first example, we’ll use Invoice #, which is found in the upper-right corner of the form. Because we want to place invoice numbers to the right of Invoice #, click the area to the right of Invoice # to move the insertion point there. If there is existing placeholder text, delete it now.
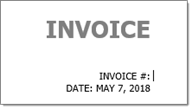
Figure 3: The Insertion Point to the Right of Invoice #
7. In the Insert ribbon’s Text section, click the Explore Quick Parts icon. The icon looks like a page that has multiple boxes of content in different colors. The Quick Parts menu will appear.
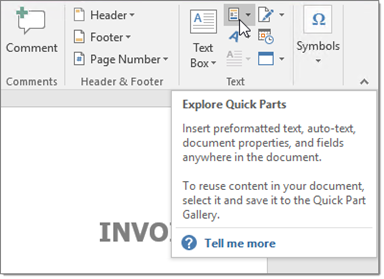
Figure 4: The Explore Quick Parts Icon
8. Hover over Document Properties, and a list of the document’s properties will be displayed. You should see both the default document properties, such as Author, Title, and Tags, as well as the names of the site columns associated to the content type.

Figure 5: The Document Property Menu
9. Select the site column you want to add as a Quick Part in the document. For our example, we’ll select the Invoice # site column. The Invoice # site column will be added to the form as a Quick part. It’ll be displayed as a gray text box with the site column’s name in square brackets, such as [Invoice #].
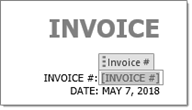
Figure 6: The Invoice # Quick Part in the Template
10. Repeat steps 6-9 to add other Quick Parts to the form in the desired locations. For our example, we’ll also add the PO # site column. Our location for purchase order numbers is in the table on the middle of the page, under PO#, so we’ll click the blank table cell, then select PO # from the Quick Parts menu. This will add the PO # Quick Part to the form.
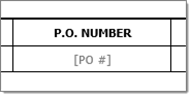
Figure 7: The PO # Quick Part in the Template
11. When you’re finished adding Quick Parts to the template, click the File tab to open the Info screen.
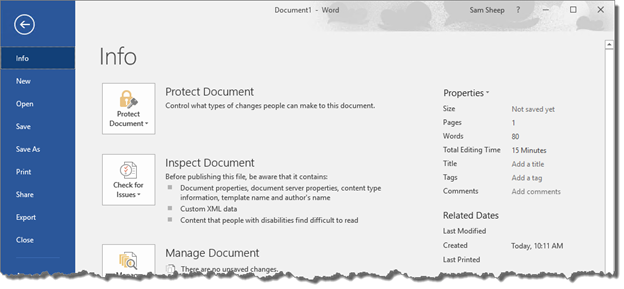

Figure 8: The Info Screen
12. Click Save As. The Save As screen will appear.
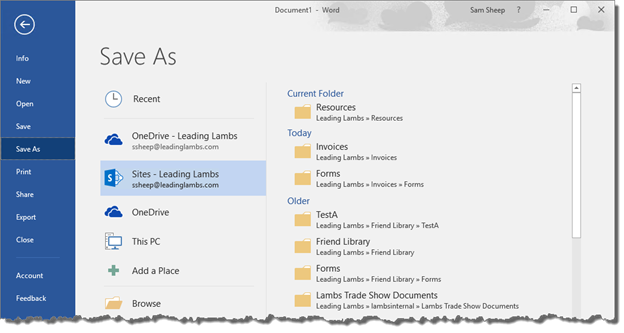
Figure 9: The Save As Screen
13. Click Browse. The Save As window will appear.
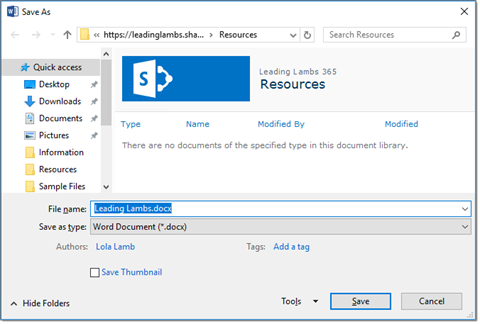
Figure 10: The Save As Window
14. Give an identifiable name to the form. For our example, we’ll save it as InvoiceTemplate.
15. In the Save as type field, click the drop-down menu, then select Word Template. The file type will change to .dotx. The Save As window will automatically change to show the Custom Office Templates folder on your PC.
16. In the Navigation menu, click Desktop. You can usually find the desktop in the Quick Access menu. The contents of the desktop will appear in the Save As window.
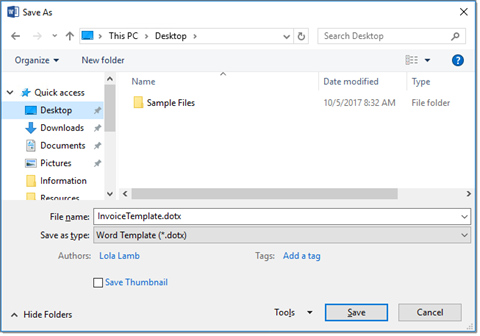
Figure 11: The Invoice Template Ready to Be Saved on the Desktop
17. Click Save. The Save As window will close, and the new form template will be saved to the desktop. You can now close the Word document.
18. In your browser window, return to the library app’s default view, if it’s not already visible.
Task 2: Edit the Content Type’s Default Template
Our next step is to update the content type’s default template and use the new template we created with Quick Parts.
1. On the library’s default view, in Suite bar, click the gear icon to open the actions menu.
2. Click Site settings. If Site Settings isn’t visible, you may need to navigate to the Site Contents page first, then in the command bar, click Site Settings. The Site Settings page will open.
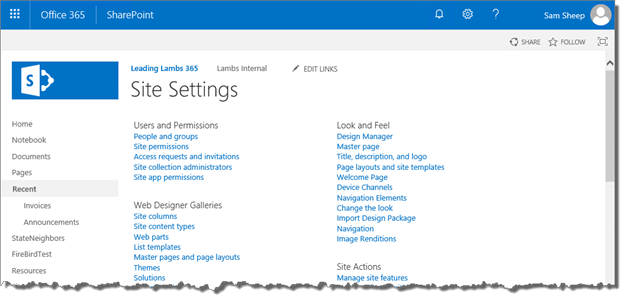
Figure 12: The Site Settings Page
3. On the Site Settings page, under Web Designer Galleries, click Site content types. The Site Content Types page will open.
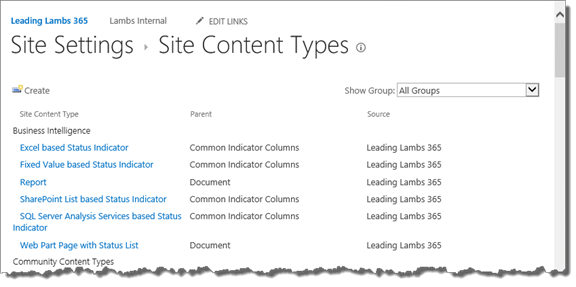
Figure 13: The Site Content Types Page
4. On the right side of the page, next to Show Group, click the drop-down menu and select the site content type group that has your content type. For our example, our Invoice content type is found in the Secret SharePoint site content type group, so we’ll select Secret SharePoint. The Site Content Types page will refresh to show only the site content types in the selected site content type group.
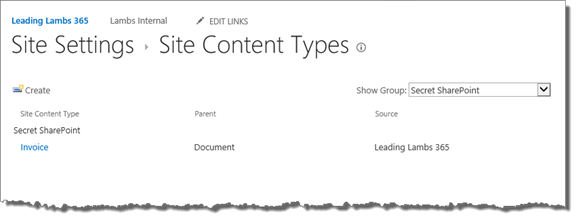
Figure 14: The Secret SharePoint Site Content Type Group
5. Click the custom content type. For our example, we’ll click Invoice. The Site Content Type page will open.
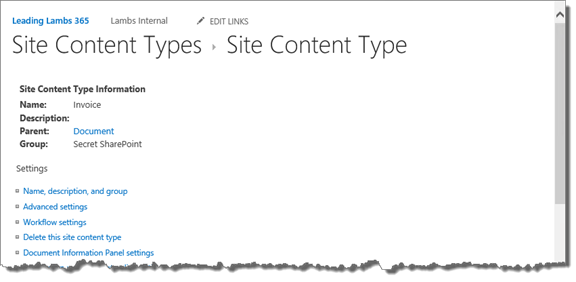
Figure 15: The Site Content Type Page for Invoice
6. Under Settings, click Advanced settings. The Advanced Settings page will open.
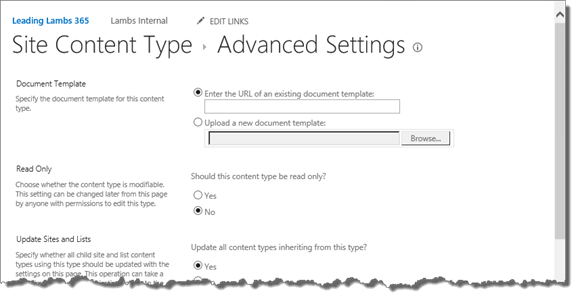
Figure 16: The Advanced Settings Page
7. In the Document Template section, select the Upload a new document template option. The Upload field will become enabled.
8. Click Browse. Your browser’s file upload window will open.
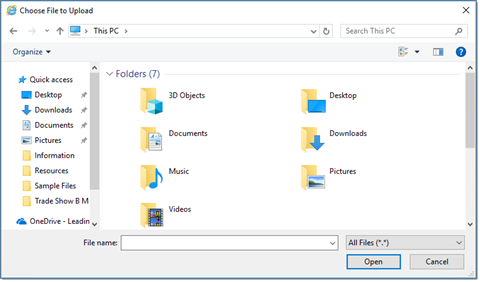
Figure 17: The File Upload Window
9. Navigate to the desktop, then click the name of the form template, such as InvoiceTemplate.dotx. The file name will appear in the File name field.
10. Click Open. The file upload window will close, and the file path will appear in the Upload a new document template field.
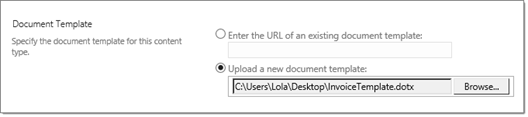
Figure 18: The New Template Ready to be Uploaded
11. At the bottom of the page, click OK. You’ll be taken back to the Site Content Type page. The new form template’s file will be uploaded as the default template for the custom form content type. Every time a user selects the content type from the New menu in the library, a new document will be created based on the form template with the Quick Parts added.
Task 3: Populate Metadata Using Quick Parts
This final task will show you how information added to the Quick Parts will be added to SharePoint without typing the information twice. You can instruct users to use these steps whenever they fill out their form.
1. If you aren’t already on the library’s default view, navigate to the library now. For our example, we’ll navigate to the Resources library.
2. In the command bar, click New. The New menu will appear.
3. Click the name of your content type. For our example, we’ll click Invoice. Depending on your library’s settings, Microsoft Word will launch, and the default document template will open.
Note: Depending on your library’s settings, Word Online may launch. At the top of the Word Online screen, click Edit in Word. The We’re opening this in Microsoft Word… dialog box will appear, and Microsoft Word will launch.
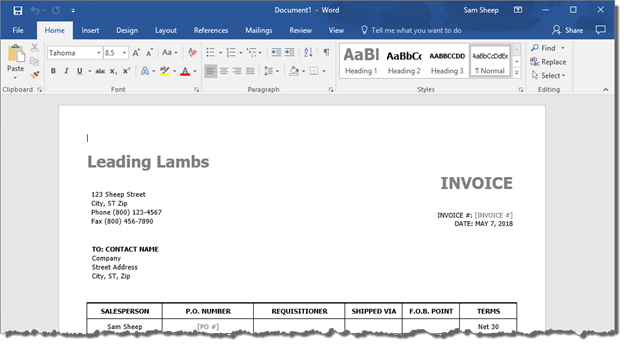
Figure 19: The New Invoice
4. Fill out the fields of your form.
5. When you get to a field that contains a Quick Part, you’ll see a gray text box with the name of the field in square brackets, such as [Invoice #]. To fill out these fields, click into the Quick Part, then type the information. For the Invoice # example, we’ll type LL-002.
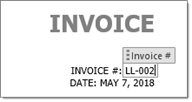
Figure 20: The Invoice # Quick Part with LL-002
6. Repeat step 5 for every Quick Part in the form. For our example, we’ll also fill out the P.O. Number field. We’ll click the Quick Part, then type PO-200.
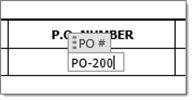
Figure 21: The PO # Quick Part with PO-200
7. When you’re finished filling out the fields, save your document. Click the File tab to open the Info screen.
8. Click Save As. The Save As screen will appear.
9. Under Current Folder, click Resources. The Save As window will open.
10. In the File name field, give a unique name to your document. For this example and for the rest of the document, we’ll use the name Invoice LL-002.
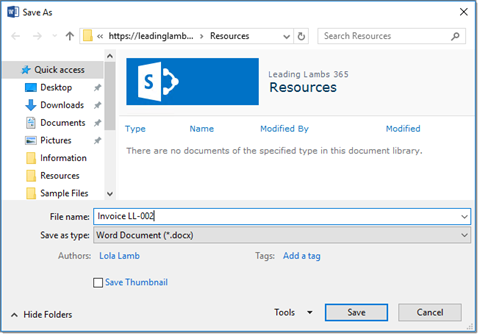
Figure 22: Invoice LL-002 Ready to Be Saved
11. Click Save. The document will be saved to the Resources library, and the information you entered into the Quick Parts will now be added to the site columns of the document library as properties of the document.
12. Close the Word document. If Microsoft Word was initially launched instead of Word Online, your browser window should show the library’s default view.
Note: If Word Online was originally launched, you should see the Word Online window instead of the library’s default view. To navigate back to the library app, in the Suite bar to the left of the document’s name, click Resources. You’ll be returned to the library app’s default view.
13. Your document will appear in the item listing with the metadata populated in the columns. For our example, you’ll see the Invoice # field contains LL-002 and the PO # field contains PO-200.
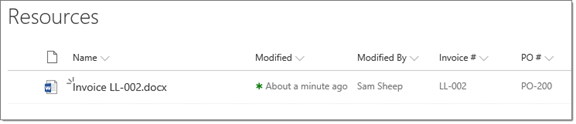
Figure 23: Invoice LL-002 with the Populated Metadata
1 Comment
Thanks for the post; I’ve been wrestling with this feature for Person and Choice fields…to no avail. They simply don’t appear under Quick Parts>Document Property.
I did succeed at creating a Flow that copies the Person/Choice values into a single-line text column (that was an adventure), but it then becomes a view-only “quick part doc property”.
I’m to the point where I may just use Site Pages over documents once the page property web part becomes available (any day now).