

These are step-by-step instructions for creating a links list that will only show the items individual users created. By using a web part, you can feature the most important links on the front page of a site. This task will walk you through adding a web part to the home page of your site. Because of the 5,000-item limit for views, if you have a very large organization, you may need to use a different solution if you think your organization will reach 5,000 links total or more.
Task 1: Create a Personal Links List
The first step is to create a list for users’ personal links. Our example will use the name “Personal Links” to identify this new list, but you can give the list any other appropriate name.
1. In a web browser, navigate to the SharePoint site where you want to create a links list. The site’s home page will open.
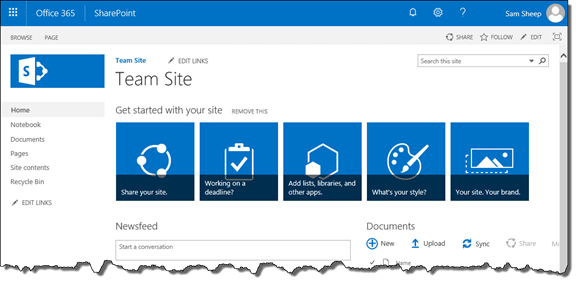
Figure 1: A Team Site’s Home Page
2. In the Suite bar, in the upper-right hand corner of the page, click the gear icon. The actions menu will open.
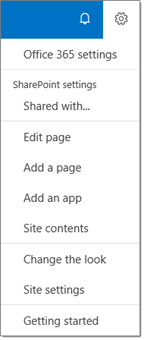
Figure 2: The Expanded Actions Menu
3. Click Add an app. The Your Apps page will open.

Figure 3: The Your Apps Page
4. Click on the Links tile. You can find this app by clicking on the “Find an app” search box, typing Links, then pressing Enter/Return. The Your Apps page will refresh to show matching search results for “Links”.
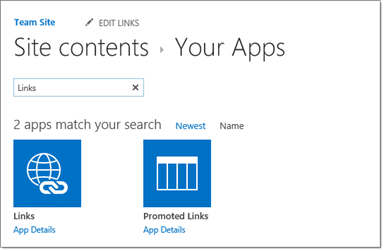
Figure 4: The Your Apps Page with Apps Matching “Links”
5. When you click on the Links tile, the Adding Links dialog box will appear.
6. In the Name field, type a name for your Links list, such as Personal Links. We’ll use the name Personal Links for the rest of this document to refer to this new list.
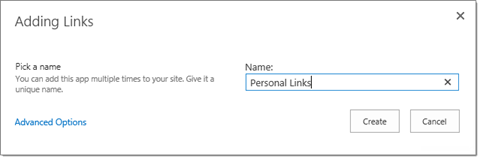
Figure 5: The Adding Links Dialog Box with the Personal Links Name

7. Click Create. The dialog box will close, and you’ll be taken to the Site Contents page.
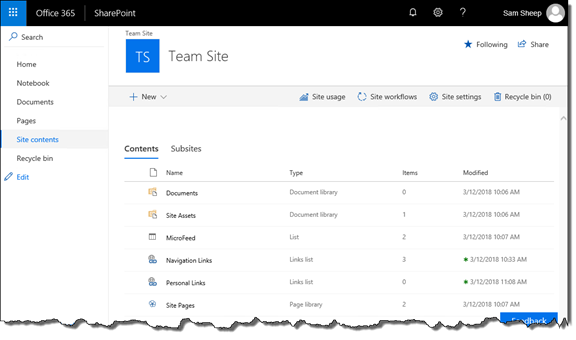
Figure 6: The Site Contents Page
8. In the site contents listing, click the Personal Links list. The Personal Links list will open.
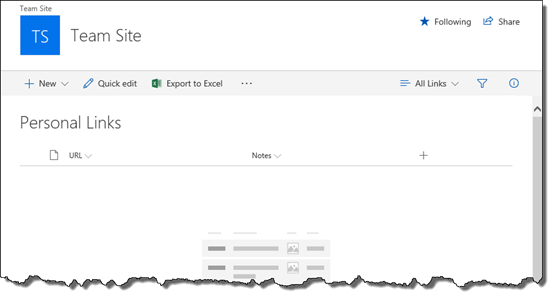
Figure 7: The Personal Links List’s Default View
Task 2: Change the Item-Level Permissions Settings
Now that the list has been created, we have to change the settings so that users will only be able to see and edit their own links. The easiest way to do this is by going into the Item-Level Permissions settings, which are found on the Advanced Settings page.
1. In the Suite bar, in the upper-right hand corner, click the gear icon to open the actions menu.
2. Click List settings. The Personal Links settings page will open.
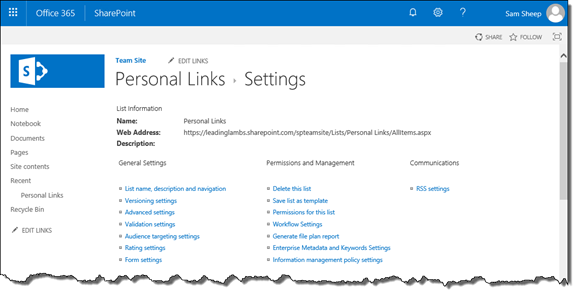
Figure 8: The Personal Links Settings Page
3. Under General Settings, click Advanced Settings. The Advanced Settings page will open.
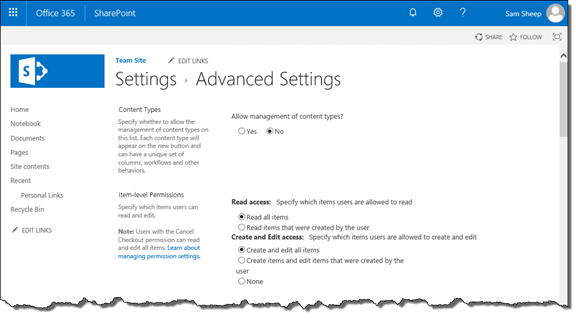
Figure 9: The Advanced Settings Page
4. In the Item-level Permissions section, under Read access, click the Read items that were created by the user radio button.
5. Under Create and Edit access, click the Create items and edit items that were created by the user radio button.
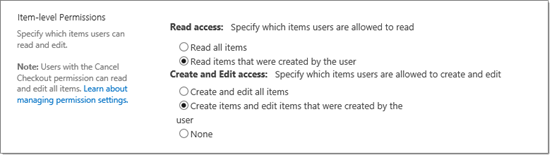
Figure 10: The Configured Item-level Permissions Section
6. At the bottom of the Advanced Settings page, click OK. You’ll be returned to the Personal Links settings page.
Task 3: Add the Personal Links Web Part to the Home Page
Now we’ll add the personal links to your site’s home page. We do this by adding a web part to the page that shows a view of the list to users. This will enable users to quickly add links that are important to them directly from the home page of the site. Keep in mind that you won’t be able to add the desired web part to a modern site page, because the List (preview) web part does not support Links lists at the time of this writing.
1. Return to the home page of the site. You can do this in the quick launch by clicking Home, or by clicking the site’s logo or name in the top navigation. The site’s home page will open.
2. Follow the steps outlined in the SharePoint Shepherd’s Office 365 Guide task, “Add a Web Part to a Wiki Page” or “Add a Web Part to a Web Part or Publishing Page,” depending on the type of page you’re working on. To select the web part for the Personal Links list, under Categories, click Apps, and under Parts, click Personal Links. Then finish the steps of the task.
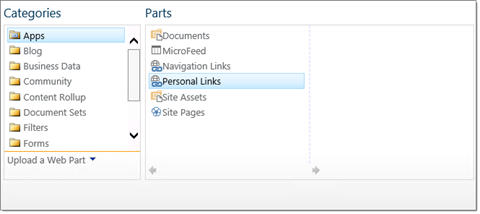
Figure 11: The Personal Links List Ready to Be Added to the Page
Task 4: Add Links to the Personal Links List
Once you’ve followed the steps for adding the Personal Links web part to the page, you can now direct users to add their own links to the list. You don’t have to send them to the list itself to create their links – they can add them directly on the home page of the site. You can send them these instructions to add their links to the home page.
1. Navigate to the home page of the site. You can do this in the quick launch by clicking Home, or by clicking the site’s logo or name in the top navigation. The site’s home page will open.
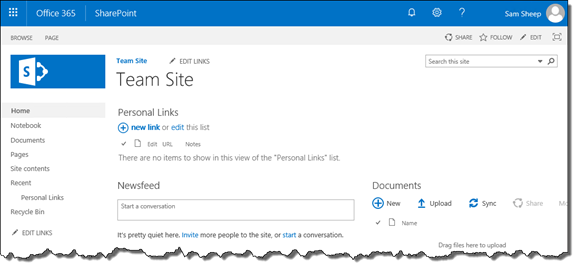
Figure 12: The Personal Links Web Part Visible on the Wiki Page Home Page
2. Under Personal Links, click new link. The New item page will open.
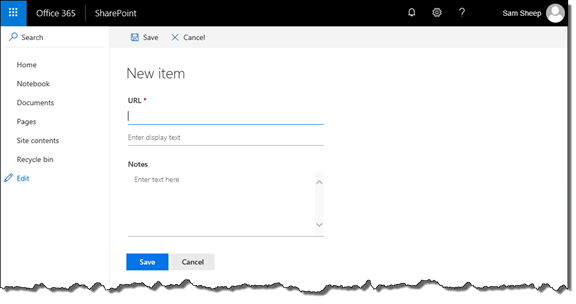
Figure 13: The New Item Page
3. In the URL field, on the top line, type the URL (or web page address) of the desired web page.
4. On the Enter display text line, type a display name for the web page.
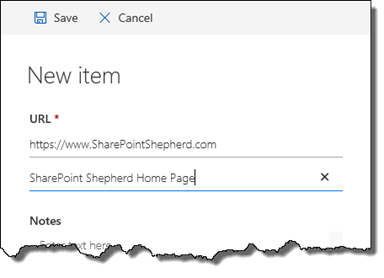
Figure 14: The Configured SharePoint Shepherd Home Page Link
5. Click Save. The item will be added to the Personal Links list, and you’ll be returned to the home page. The new link will appear under Personal Links. It will only be visible and editable for the user who created the link.
6. Repeat steps 18-21 to continue adding links as desired.
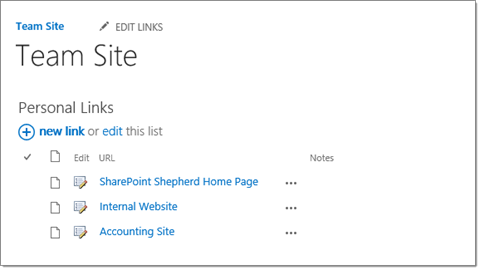
Figure 15: New Personal Links Visible on the Home Page
No comment yet, add your voice below!