

This step-by-step begins by creating a Links list. Links lists are specifically designed for housing links to internal and external web addresses. Once the Links list is created, we’ll add a few links to the list. Then we’ll learn how to break permission inheritance on individual items, which will allow us to change the permissions for that item.
Task 1: Create a Links List
First, we have to create a list that can hold our navigation links. Our example will use the name “Navigation Links” to identify this new list, but you can give the list any other appropriate name.
1. In a web browser, navigate to the SharePoint site where you want to create a links list. The site’s home page will open.
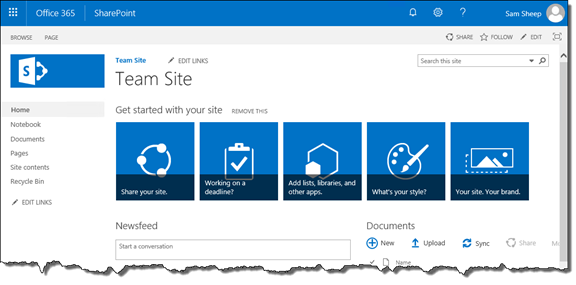
Figure 1: A Team Site’s Home Page
2. In the Suite bar, in the upper-right hand corner of the page, click the gear icon. The actions menu will open.
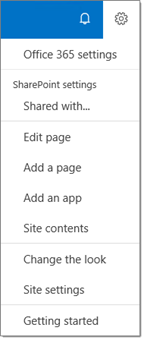
Figure 2: The Expanded Actions Menu
3. Click Add an app. The Your Apps page will open.
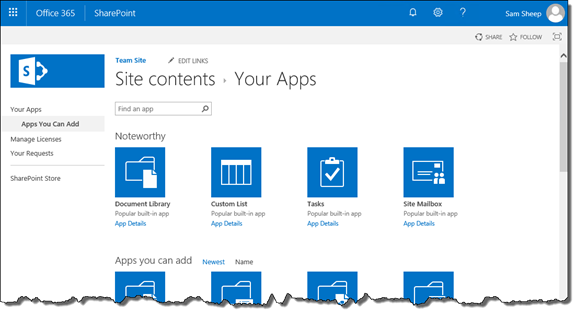
Figure 3: The Your Apps Page
4. Click on the Links tile. You can find this app by clicking on the “Find an app” search box, typing Links, then pressing Enter/Return. The Your Apps page will refresh to show matching search results for “Links”.

Figure 4: The Your Apps Page with Apps Matching “Links”
5. When you click on the Links tile, the Adding Links dialog box will appear.
6. In the Name field, type a name for your Links list, such as Navigation Links. We’ll use the name Navigation Links for the rest of this document to refer to this new list.
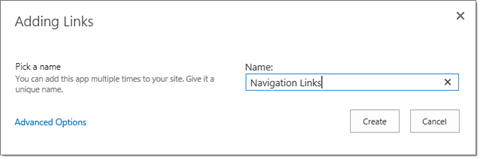
Figure 5: The Adding Links Dialog Box with the Navigation Links Name
7. Click Create. The dialog box will close, and you’ll be taken to the Site Contents page.
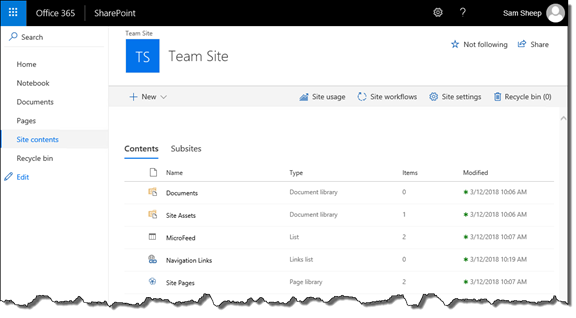
Figure 6: The Site Contents Page
8. In the site contents listing, click the Navigation Links list. The Navigation Links list will open.
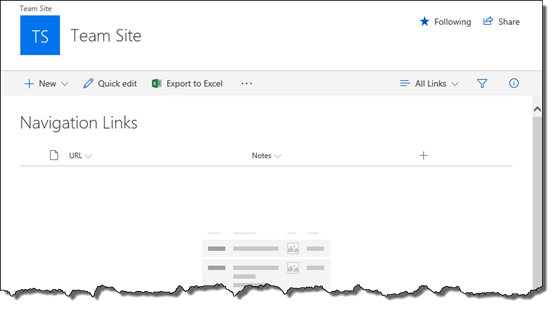
Figure 7: The Navigation Links List’s Default View
Task 2: Create Links in the Navigation Links List
Now that the Navigation Links list has been created, we need to start adding links to the list. Because these will be featured on the home page of your site later on, make sure these links are useful to the viewers of the list.
1. In the command bar, click New. The New menu will expand.
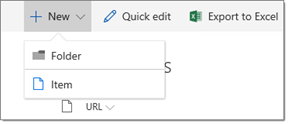
Figure 8: The Expanded New Menu

2. Click Item. The New item pane will appear.
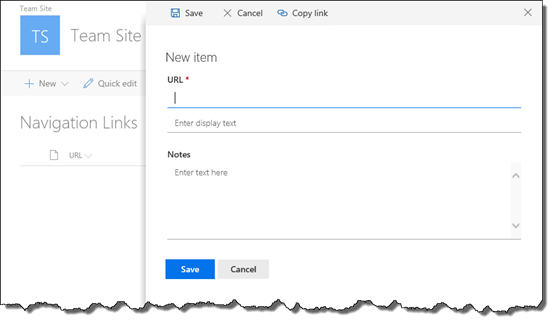
Figure 9: The New Item Pane
3. In the URL field, on the top line, type the URL (or web page address) of the desired web page.
4. On the Enter display text line, type a display name for the web page.
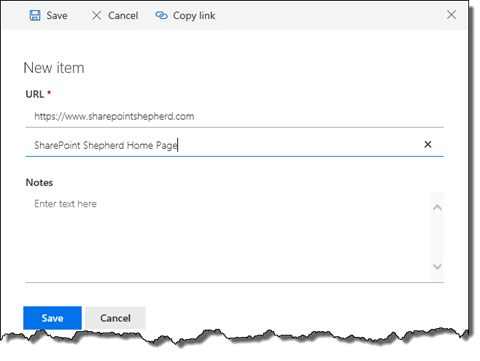
Figure 10: The Configured SharePoint Shepherd Home Page Link
5. Click Save. The New Item pane will close, and the link will be added to the list. You may need to refresh the page to see the new link.
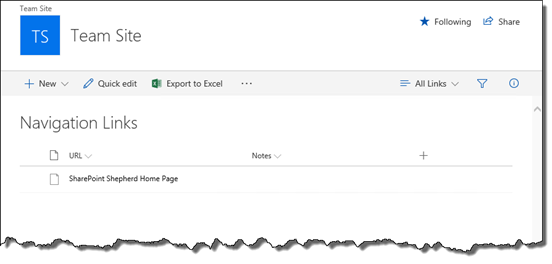
Figure 11: The New Link on the Navigation Links List
6. Repeat steps 9-13 to add more links to the list as desired.
Task 3: Change Permissions for a Link
Now we’ll finally edit the permissions for the links. Some links might be useful for all of the visitors of your site. In this case, there’s no need to change those links’ permissions. However, you may wish to hide some links, such as links to sites that hold sensitive materials, from all but a select few users.
1. Find a link you want to change permissions for. To the left of its name, click the checkmark to select that item.
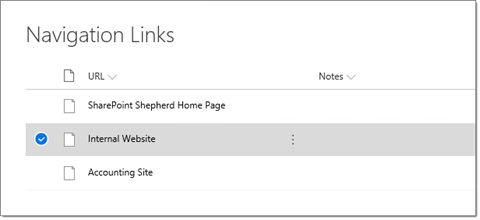
Figure 12: The Internal Website Link Selected
2. In the command bar, click Share. The Send Link dialog box will open.
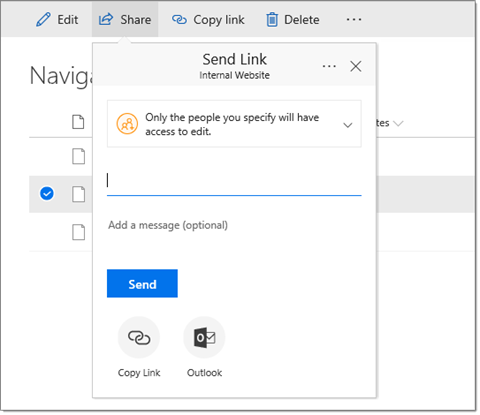
Figure 13: The Send Link Dialog Box
3. To the right of Send Link, click the ellipsis control to show more options.
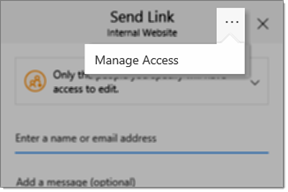
Figure 14: Additional Option in the Send Link Dialog Box
4. Click Manage Access. The Manage Access pane will appear.
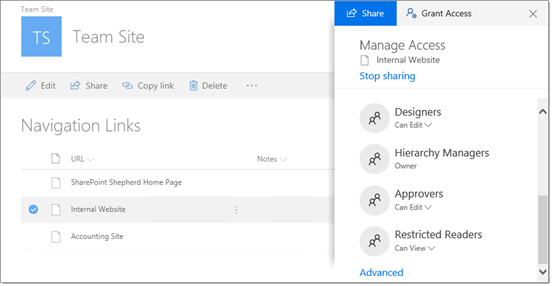
Figure 15: The Manage Access Pane with Advanced Visible
5. At the bottom of the Manage Access pane, click Advanced. The Permissions page for the item will appear.
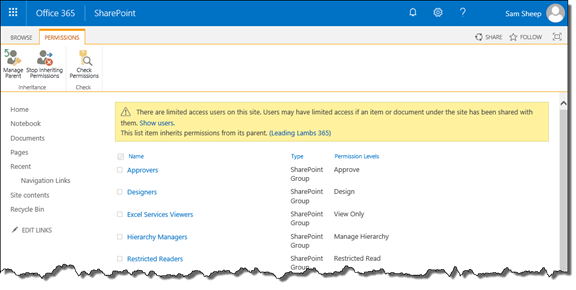
Figure 16: The Permissions Page for the Internal Website Link
6. In the Permissions ribbon, click Stop Inheriting Permissions. A confirmation dialog box will appear.
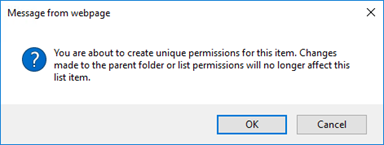
Figure 17: The Create Unique Permissions Confirmation Dialog Box
7. Click OK. The Permissions page will refresh, and the item will now have unique permissions.
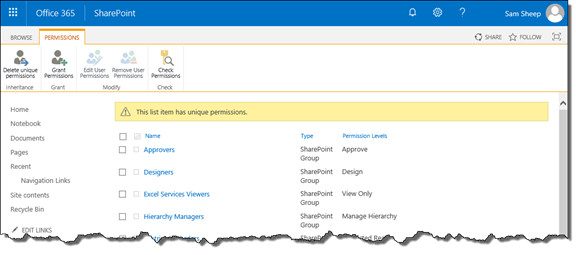
Figure 18: The Item with Unique Permissions
8. We want to remove permissions for the Visitors and Members groups. To remove permissions for those two groups, click the checkmarks to the left of [Site Name] Members and [Site Name] Visitors. In the example below, the site name is Team Site.
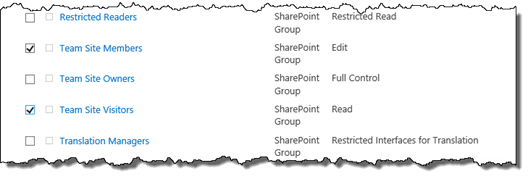
Figure 19: Team Site Members and Visitors Selected
9. In the Permissions ribbon, click Remove User Permissions. A confirmation dialog box will appear.
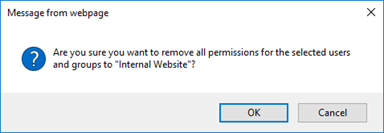
Figure 20: The Remove All Permissions Confirmation Dialog Box
10. Click OK. Permissions will be removed for the Visitors and Members groups, and the Permissions page will refresh. The item will now no longer be visible for anyone in the Visitors or Members groups when viewing the list.
11. To add individual permissions for individual users or groups, in the Permissions ribbon, click Grant Permissions. The Share dialog box will appear.
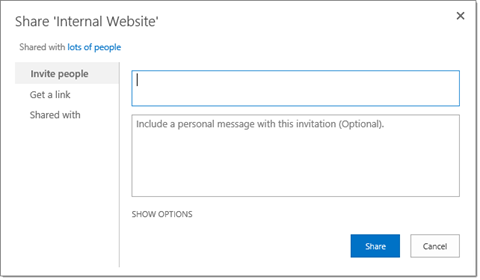
Figure 21: The Share Dialog Box
12. Start adding the names of the groups you want to grant permissions to. As you type, a list of matching results will appear. You can click the name to complete the entry.
13. Click Show Options. More options will appear.
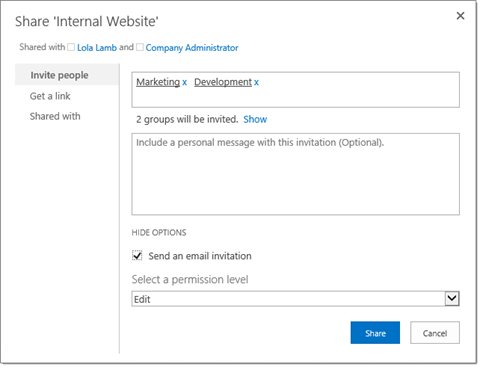
Figure 22: The Expanded Share Dialog Box
14. Under Select a permission level, select the desired permission level from the list. By default, Edit is selected, but you can click the drop-down arrow to open the menu and select another permission level.
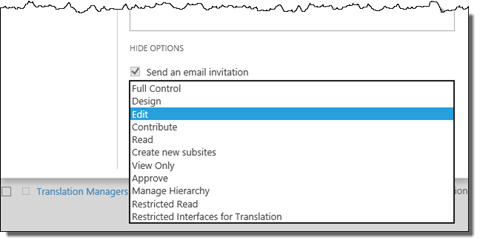
Figure 23: The Expanded Permissions Menu
15. Click Share. The Share dialog box will close, and the item will now be visible for that group.
16. To return to the Navigation Links list, click the Browse tab to close the ribbon.
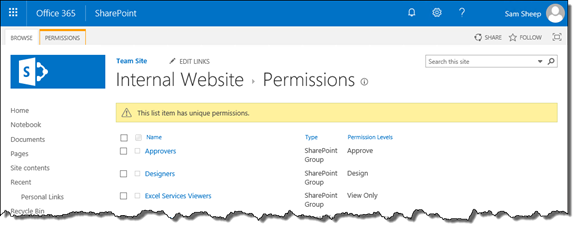
Figure 24: The Breadcrumb Bar Visible on the Permissions Page
17. In the breadcrumb bar, to the left of Permissions, click the name of the item (in this case, you’d click Internal Website). You’ll be taken to the item’s properties page.
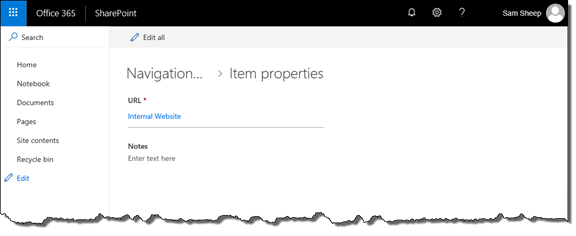
Figure 25: The Item Properties Page
18. In the breadcrumb bar, to the left of Item properties, click Navigation Links (in the example, this is visible on screen as Navigation…). You’ll be taken back to the Navigation Links list’s default view.
19. Repeat steps 1-18 to change the permissions for any other desired links.
Task 4: Add the Navigation Links Web Part to the Home Page
Finally, we’ll add these navigation links to the home page. We can do this by adding a web part to the page that shows a view of the list to users. The permissions that were set on the links apply to the view shown, so each person viewing the home page might see different navigation links depending on their own permission levels. Keep in mind that you won’t be able to add the desired web part to a modern site page, because the List (preview) web part does not support Links lists at the time of this writing.
1. Return to the home page of the site. You can do this in the quick launch by clicking Home, or by clicking the site’s logo or name in the top navigation. The site’s home page will open.
2. Follow the steps outlined in the SharePoint Shepherd’s Office 365 Guide task, “Add a Web Part to a Wiki Page” or “Add a Web Part to a Web Part or Publishing Page,” depending on the type of page you’re working on. To select the web part for the Navigation Links list, under Categories, click Apps, and under Parts, click Navigation Links. Then finish the steps of the task.
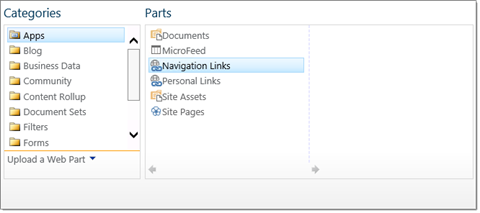
Figure 26: The Navigation Links List Ready to Be Added to the Page
No comment yet, add your voice below!