Robert Bogue
April 1, 2024
No Comments
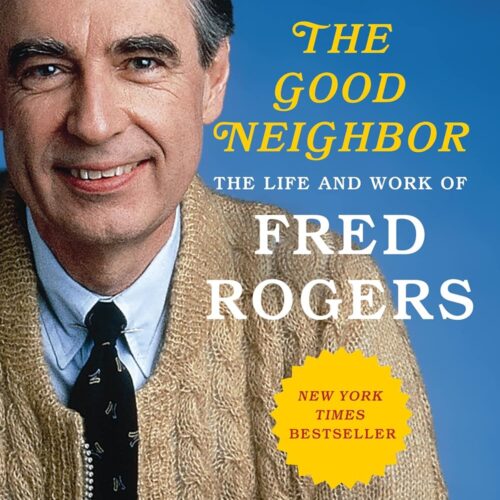
There aren’t that many television shows I remember from my childhood. Mister Rogers’ Neighborhood is one of them. In The Good Neighbor: The Life and Work of Fred Rogers, Maxwell King speaks of the man behind the scenes. The story is of a man who, though not perfect, lived out his life caring for and educating children on the most important parts of life, their emotions.
Sissy
Fred Rogers had his fans, but he had his critics, too. People who felt that he wasn’t masculine enough. People who felt all this talk about feelings made him – and the kids who watched – into “sissies.” Part of that was a sign of the times. A time of masculine men in Westerns who conquered the West with nothing more than a 30-30 rifle and a trusty horse. It was, of course, make-believe. In the real world, people didn’t wear white hats if they were good and black hats if they were bad.
But talking about emotions at the time wasn’t okay. We’d only exited World War II a decade earlier, and that was a time when we told boys (and men) to “keep a stiff upper lip.” Even a few decades later, Tom Hanks’ character in A League of Their Own would utter the line, “There’s no crying in baseball.” Speaking of emotions in the late 1960s and beyond wasn’t okay. It wasn’t the thing we did. It was one of the counter-cultural ways that Rogers was criticized.
Competition
The other television show I remember, and the chief “competition” to Mister Rogers’ Neighborhood, was Sesame Street. (See “G” is for Growing for more on Sesame Street.) The relationship between the shows was very positive, with neither organization disparaging the other in the media though they both took a radically different approach to children’s television.
Rogers was slow and methodical. The transitions between segments were drawn out to create space for his young audience to make the transition to a different kind of thought – or to recognize the difference between “real life” and make believe. Sesame Street, in contrast, used fast cuts and quick changes to ensure that the child never got bored.
Sesame Street’s focus was different, too. It was letters and numbers. It was about the hard, tangible, measurable facts that could be crammed into children’s heads. Rogers was more interested in what we’d today call social-emotional learning. That is, he was concerned that children learn to accept and adapt their emotions to fit their environment.
Rogers was adamantly opposed to any kind of marketing to children, and while Sesame Street didn’t interrupt the show with advertisements, they were more open to commercial opportunities. Still, both programs were set apart from the others of the time. Other children’s shows of the time featured vaudeville and slapstick humor that did nothing to enrich the viewer. The other shows were, in effect, cheap babysitting. That, too, was something that Rogers never wanted to be.
Loneliness and Isolation Becomes Advantage
Fred Rogers struggled with some illness and frailty growing up. His family was wealthy and that afforded him some benefits – but also made him “different.” The result is a relatively isolated and somewhat lonely existence for the young Fred Rogers. However, one of Rogers’ unique talents was transforming the challenges that he faced in his life in ways that could powerfully help others.
It was in the attic of his home that he developed a fondness for the puppets that would become constant companions for his professional career. It’s the vulnerability and loneliness he felt that made him so focused on speaking to each child as a real person, giving them full attention. He saw in his “neighbors” the pain he had felt, and he wanted to enter their world.
Television Power
As Rogers was finishing college, he became enamored with the potential power of television to influence, shape, and educate children. It was a time of rapid growth immediately after the development of television where people were struggling to understand the new medium. Many were treating television as radio with pictures – defaulting to the kind of programming that worked on radio. What children’s programming existed didn’t rise to the capabilities of the medium to educate and engage.
Rogers spent time at NBC in New York learning from some of the earliest pioneers in the business.
Josie and the Puppets
After college and his time at NBC, he returned to Pittsburgh, near his childhood home of Latrobe. By this time, he and (Sara) Joanne were married and having children. Being close to home was a choice for raising a family. Rogers started at a small independent television station, WQED. There wasn’t much of a budget at all and certainly not for children’s programming. So, he and Josie Carey, with a small crew, began to develop a Children’s Corner program.
It was here that we met Rogers’ puppets and where Josie began to talk to the puppets as if they were real, knowing full well that they were really Rogers. The transition, where an adult could speak with puppets as if they were real and alive, was an accident, but it worked. It gave the viewer space to join in a less-threatening conversation and to see how people can talk in safe ways.
Josie and Rogers had different paths in life, and Children’s Corner came to an end. However, that early work created the characters of Daniel the Tiger, X the Owl, Queen Sara, and King Friday. These characters would serve as the backbone of the land of make believe for decades.
You Know, Fred, I’m Gay
It could be the naivete of a child. It could be that he genuinely didn’t pass judgement on others, but it appears that he couldn’t care less about the kinds of things that would be divisive at the time. He made a point of putting feet in a pool with a black man when the segregated South said that whites and blacks couldn’t be in the same pool.
Joanne recalls a time when Fred was trying to get a friend dates with women until he said, “You know, Fred, I’m gay.” According to Joanne, he truly didn’t care.
The Arsenal Center
Rogers wasn’t alone in his quest to elevate the approach to children. He studied with Dr. Margaret McFarland and then sought out her advice on how to structure his programs in ways that resonated with children. McFarland and others at the Arsenal Center were studying what did and didn’t work with children. Dr. Spock and Eric Ericson are some of those with whom McFarland studied and worked. Some of the leading researchers in childhood development were available to Rogers when he wanted to get the programming right. (It’s probably more accurate to say that he needed it to be right.)
He learned and then refined the awareness that children learn through a mixture of reality and make believe. They learn when they can try out ideas without the risks that exist in the real world. There’s plenty of research, especially in Play, about the value of play in children. Some of the play is about simulating interactions and outcomes. (See Sources of Power for simulation.)
Fred’s warm acceptance of everyone, especially children, was coupled with the best research of the time. The result ultimately would become Mister Rogers’ Neighborhood – but not before he had made a detour to Toronto to work for the CBC.
First in Mental Health
Rogers famously testified before the Senate Subcommittee on Communications and Senator Pastore about appropriations for public television. In his conversation with Pastore, he said, “And I feel that if we in public television can only make it clear that feelings are mentionable and manageable, we will have done a great service for mental health.” The year was 1969. It’s well before Lisa Feldman Barrett’s book, How Emotions Are Made, and even Richard Lazarus’ book, Emotion and Adaptation.
James Pennebaker’s work, Opening Up, is effectively what Rogers was proposing. Pennebaker used writing to reduce the impacts of trauma, and Rogers used his platform of television to normalize the discussion of emotions.
Freddish Translation
There’s the description of the process that Rogers used to convert an idea into a workable structure for children. The conversion process was written, directly quoted, as follows:
- State the idea you wish to express as clearly as possible, and in terms preschoolers can understand.
- Rephrase in a positive manner, as in “It is good to play where it is safe.”
- Rephrase the idea, bearing in mind that preschoolers cannot yet make subtle distinctions and need to be redirected to authorities they trust.
- Rephrase your idea to eliminate all elements that could be considered prescriptive, directive, or instructive.
- Rephrase any element that suggests certainty.
- Rephrase your idea to eliminate any element that may not apply to All children (as in, having PARENTS).
- Add a simple motivational idea that gives preschoolers a reason to follow your advice.
- Rephrase your new statement, repeating Step One (i.e., GOOD as a personal value judgment.)
- Rephrase your idea a final time, relating it to some phase of development a preschooler can understand (i.e., growing)
Loss and Life
I have a sense of loss when I recall Mister Rogers’ Neighborhood. In part, it’s the loss of Fred Rogers. I’d love to get a chance to meet him today. Another part is that part of life I’ve long since passed. In one of Rogers’ poignant episodes, he dealt with the topic of death and loss. In it, he repeatedly reinforced that life goes on. He didn’t just tell kids blindly that it would be okay, but rather reminded them that life goes on.
I Have Been Talking to You for Years
Sometimes, the small snippets reflect the larger picture like fractals – always the same whether smaller or bigger. (See Fractal Along the Edges for more.) During the episode where Rogers dipped his feet in a kiddie pool with François Clemmons, who was portraying a black officer, he ended the show with the same words as every episode, “You make every day a special day just by being you, and I like you just the way you are.” Clemmons looked at Rogers and was struck by the thought that Rogers was speaking directly to him. When he asked Rogers about it, the response was, “I have been talking to you for years. But you heard me today.”
There are two important pieces here. First is that Rogers constantly affirmed his little audience for decades. He always ended with the enduring truth that every person is valuable just the way they are. The second piece is that Rogers was passionate about accepting others – perhaps in ways that he wasn’t accepted while growing up. (See also How to Be an Adult in Relationships for the importance of acceptance.)
Family
It’s important to note that one of Fred Rogers’ sons rebelled against his father. Jim stopped communicating with his parents for a while. While those rifts were eventually closed, many other families never recover from the fractures. (See Fault Lines for more on rebellion, rifts, and separations.) Understanding how the rift could start requires a more nuanced and complicated view of family, including Judith Rich Harris’ observations of the randomness. (See No Two Alike and The Nurture Assumption.)
It also requires awareness of Erikson’s stages of development and that children need to assert their independence. (See Childhood and Society for more.) There is a time when children need to spread their wings before deciding whether to come back to the nest – or not.
Fear and Doubt
Fred Rogers wasn’t immune from the fear and doubt that we all feel about our abilities and contribution to the long arc of humanity. He had doubts that his work was having the impact he wanted – or enough impact. He wondered what more he could do to help others.
However, something stuck that his mother told him. When disaster strikes, “there are still so many helpers – so many caring people in the world.” Whatever the internal view that occasionally struck Rogers, many people would say that he was one of the best helpers. He was The Good Neighbor.