

We recently used Power Automate to create a workflow (which we’ll call the “flow” in this post) that automatically sends a Forms submission to a SharePoint list. For the most part, this was a straightforward process, since the Form and the List had columns that held the same type of data. The trigger is when a response is submitted for that particular Form; add an action to get the response details; then create the item in SharePoint, with the response details added into their corresponding list column.
The challenge came when we got to a choice field in the Form that allowed for multiple selections. There were two parts to this challenge: first, directly inputting the dynamic content from the Get Response Details action resulted in a string in the choice field in the format [\”Option A\”,\”Option C\”] rather than corresponding to the preexisting Option A, Option C, etc. in the list; and second, we wanted the ability to add, remove, or change options in the choice field without needing to also update the flow.
When we looked up the process online, the answers being given were overly complicated and a bit nonsensical. This post is designed to walk through our process of getting all of the choices in a multi-select choice field from a Microsoft Form into a SharePoint list. We’ll talk about some of the snags we hit along the way.
In this post, we’ve added a few styles to help explain the process. Bolded items are action items; these are typically specific things on the screen you should click or select. Underlined items are what you should read on screen, but not necessarily directly interact with, such as the name of a field or section; use these to help orient yourself to where you should be looking. Courier New font is used to indicate specific things that should be typed.
The Process
First, make sure your Form and SharePoint list contain the same fields. In the case of the SharePoint list, ensure your choice field has each option listed and the Allow multiple selections option toggled On.
Create the Flow
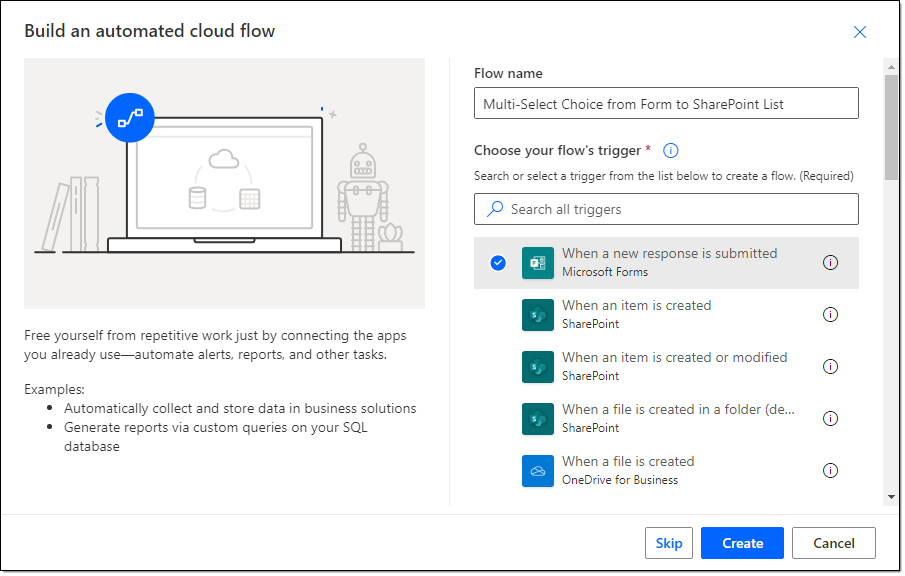
Go to Power Automate and create a new Automated cloud flow. Give a name to your flow. For the trigger, select the Microsoft Forms “When a new response is submitted” trigger, then Create the flow.
In the Form Id field, select the corresponding Form. If it was created directly in the Microsoft Forms interface, it’ll be listed in the drop down menu. This was our first snag: we created our Form in Teams. If you created it via Teams like we did, you’ll need to manually find and input the form ID. Navigate to your Form in Teams, then right-click the tab with the Form, and click Go to website. When the Form appears in the browser, find FormId in the URL, then copy everything after the equals sign (=) – it should be a long string of characters. Go back to your flow and, for Form Id, click Enter custom value, then paste in the Form’s ID.
New step, then select Get response details. Add the form ID as you did above. For Response Id, select the dynamic content Response Id.
Parse JSON
New step, then select Parse JSON. In Content, select the dynamic content under Get response details for the multi-select choice field. To build the Schema, click Generate from sample, then type or paste in the following:
[“Red”,”Blue”]
This won’t match the options in your form – that’s okay. This step is to simply teach the Parse operation how the data will be displayed, not necessarily what. Click Done. A JSON schema will automatically be generated. Importantly, you’ll see it will generate an array.

Convert Selection Array to String
New step, then select Initialize variable. This is the first of two variables we’ll create. It’ll be used to transform the array of selected options into a string. Give your variable a name. For Type, select String. Leave Value blank. For this example, we named it ColorInput to indicate the “raw” inputs into the field.
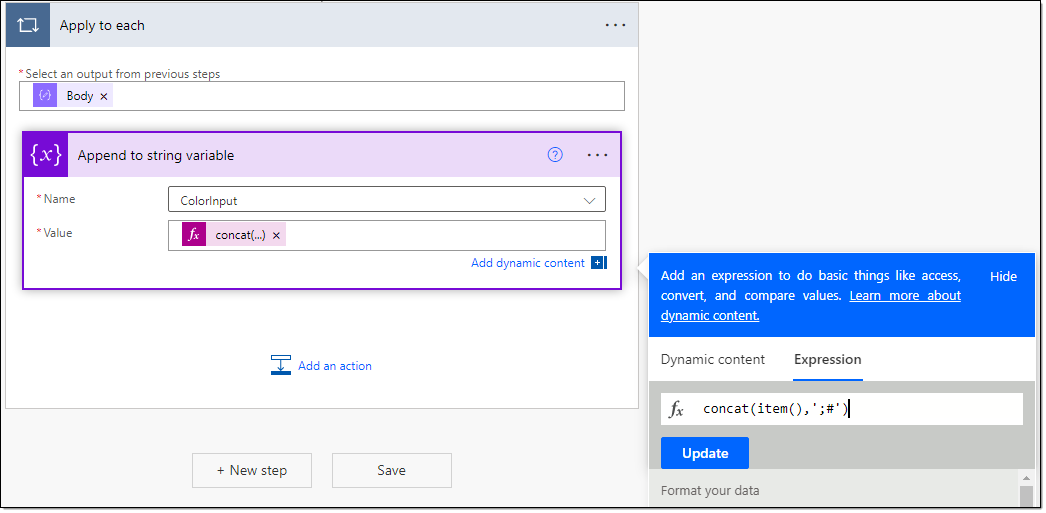
New step, then Apply to each. In Select an output from previous steps, select the dynamic content under Parse JSON for Body. Within the Apply to each step, Add an action, then select Append to string variable. In Name, select the name of the variable you just created. In Value, select Expression, then type in the following formula:
concat(item(),’;#’)
As you type, closing parentheses and apostrophes will be added automatically, so make sure you avoid duplicating characters. What this function does is add a ;# to the end of each choice, which is what SharePoint will use to determine the different options selected. Then click OK.
Trim String Length
Outside of Apply to each, New step, then select Initialize variable. This is our second variable, which we will use to make our final adjustments to the first. This was another snag we found, since the flow won’t allow you to select a variable and then change that same variable. Give your new variable a name. For Type, select String. Leave Value blank. For this example, we named it ColorFinal to indicate that it would hold the final, readable transformation of the raw inputs.
New step, then select Condition. A quirk we found at this point is that the previous step will result in a “blank” option being added into the SharePoint choice field. We use this condition to check to see if any option is selected, and if so, it will trim the last couple of characters off the end, which removes the “blank” item. In the leftmost Choose a value, select Expression, then type the following formula. You’ll need to replace ColorInput (our first variable’s name) with the name the first variable you created.
length(variables(‘ColorInput’))
Click OK. Click is equal to to open the menu, then select is greater than. In Choose a value, type 2.
Move to the Yes side of the condition. Add an action, then select Set variable. In Name, select the second variable created. In Value, select Expression, then type the following formula. Just like with the previous Expression, you’ll need to replace ColorInput (our first variable’s name) with the name of the first variable you created.
substring(variables(‘ColorInput’),0,sub(length(variables(‘ColorInput’)),2))
Add to SharePoint List
Beneath the condition, New step, then select Create item. In the Site address, select the SharePoint site containing your corresponding list. Then, in List Name, select the corresponding list. For each field except for the multi-select choice fields, you can use the dynamic content under Get response details to match each field in the Form to each field in the list.
Find the box that indicates the multi-select choice field of the list (it will be surrounded by a dashed line). It will read [Field] Value – 1. Click on it, and when the drop-down menu appears, select Enter custom value. Then select Dynamic content, under Variables, choose the second variable created – for our example, ColorFinal.
Save and test your flow. Any number of selected options in the Form’s multi-select choice field should now be correctly transferred into your multi-select field in the list.
2 Comments
Can you send me a screenshot of your complete flow?
Thank you!!!! After so many blogs and forums this finally worked for me