This step-by-step teaches you how to configure a web browser to submit your login credentials for you. This task works for both the Internet Explorer and Google Chrome browsers.
1. Click Start or the windows key to open the start menu.
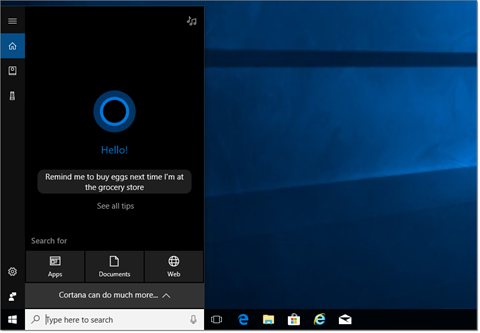
Figure 1: The Expanded Start Menu
2. Type control panel. A list of matching results will appear.
3. Click Control Panel. The Control Panel will appear.
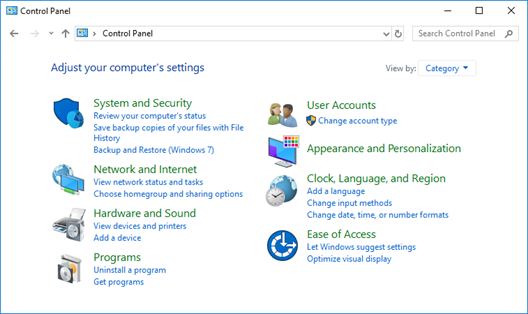
Figure 2: The Control Panel
4. Click Network and Internet. The network and internet options will appear.
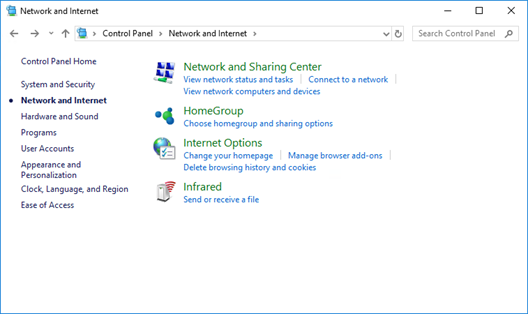
Figure 3: The Network and Internet Options
5. Click Internet Options. The Internet Properties window will appear.
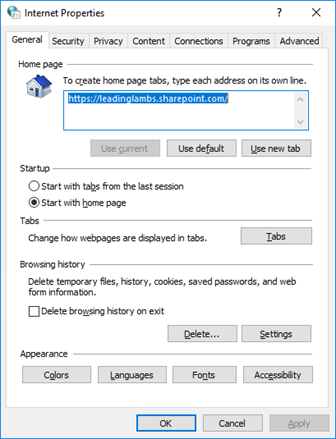
Figure 4: The Internet Properties Window
6. Click the Security tab. The security settings will appear.
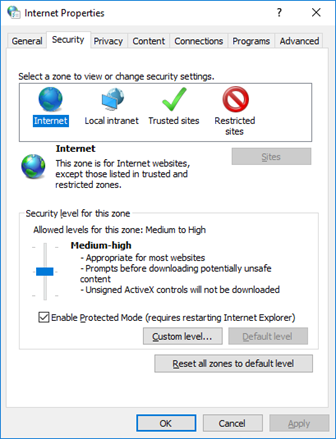
Figure 5: The Security Tab
7. Under Select a zone to view or change security settings, click Local intranet. The Local intranet zone information will appear.
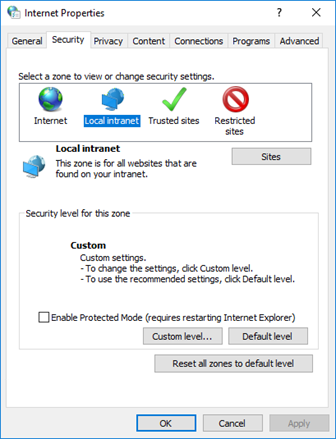
Figure 6: The Local Intranet Zone
8. To the right of Local intranet, click Sites. The Local intranet window will appear.
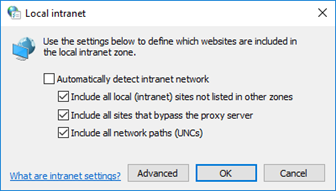
Figure 7: The Local Intranet Window
9. Click Advanced. Another Local intranet window for adding and removing sites will appear.
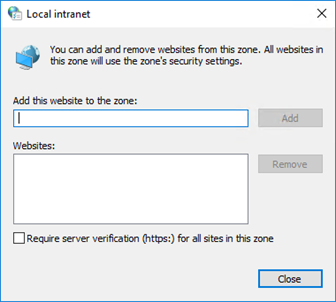
Figure 8: The Local Intranet Window for Adding Sites
10. Under Add this website to the zone, type the URL for your SharePoint domain. To make sure we capture all the sites in the domain, we’ll add an asterisk (*) before the domain name. It should look something like https://*.domain.com. For example, if our domain is contoso, the URL will be https://*.contoso.com.
11. Click Add. The domain will be added to the local intranet list.
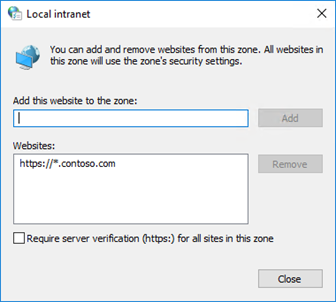
Figure 9: The Domain Added to the Local Intranet
12. Click Close. The Local intranet window will close.
13. To the right of Advanced, click OK. The original Local intranet window will close.
14. At the bottom of the Internet Properties window, click OK. The changes will be saved, and the websites will be added as local intranet sites. The web browser will now submit credentials for you when you visit those sites.


No comment yet, add your voice below!